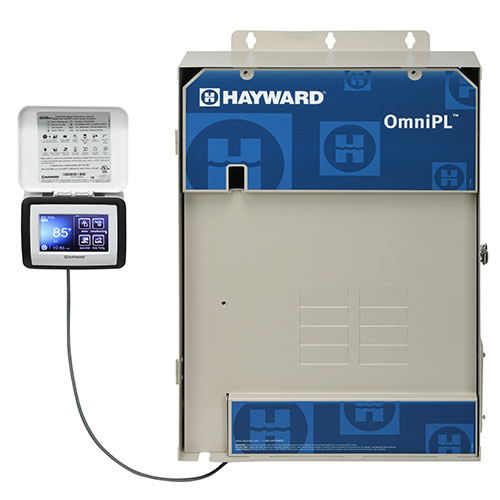
Caring for a Credible Pool (Omni)

OUR INGROUND POOLS ARE DESIGNED FOR MINIMAL EFFORT AND MAXIMUM ENJOYMENT HOWEVER…
A Pool is Still Work and There is a Lot to Learn!
The purpose of this online manual is to provide a basic guide for our new pool customers to begin learning general concepts. People often want an in person tutorial which we are happy to do, but if you have never owned a pool, it can be overwhelming.
We of course are always available for questions but PLEASE take the time to read through this Credible Pool owner’s manual, bookmark this page, and you will find almost all your questions answered! This information also applies to a new system/filter/salt generator we may have installed for you.
Chlorine and Flow!
These 2 things should be 90% of your focus!
Caring for your pool the way we teach is the easiest way to maintain an in-ground pool.
- Chlorine: sanitizes your water and keeps it clear. TEST your water WEEKLY!
- Flow: Do you see good water movement at the pool? You may need to clean filter -> BACKWASH?
We install and recommend Diatomaceous Earth (DE) Filters because they filter the best and are easier to clean and cheaper to maintain. Water filters through a fine DE powder that is added to the filter through the skimmer.
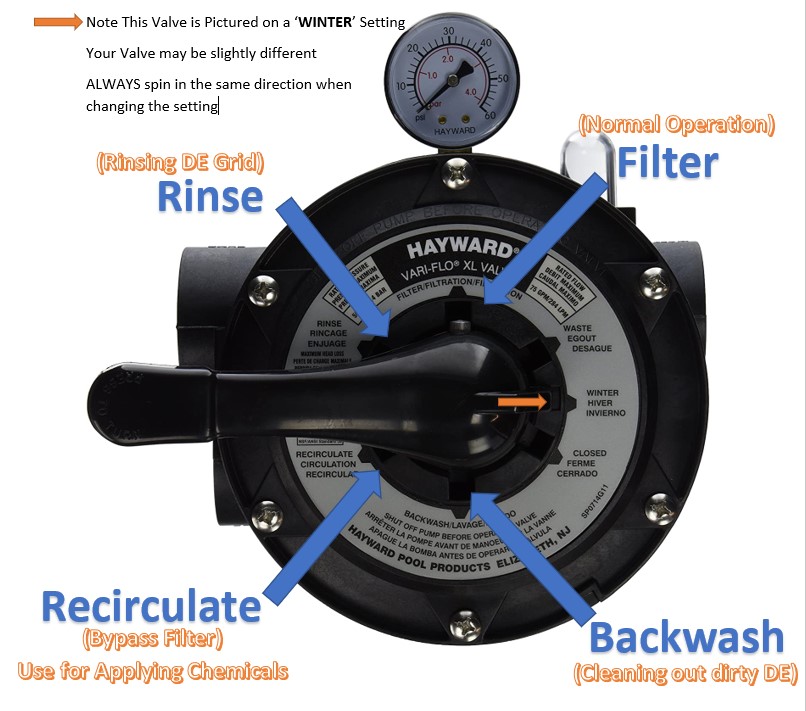

WATCH Filter Sight Glass OR of you can see water coming out of the Backwash Hose
SHORT BACKWASH (QUICK CLEAN)
1. BACKWASH > 2. RINSE > 3. FILTER
BACKWASH UNTIL WHITE
STOP when water Turns White ~ 1 minute
DO NOT add more DE Powder
Detailed Steps:
- Turn OFF Pump and OPEN Backwash Valve (if applicable)
- Spin Valve in Same Direction to BACKWASH
- Turn ON Pump and STOP when it turns white ~less than a minute
- Turn OFF Pump
- Spin Valve in Same Direction to RINSE
- Turn ON Pump and rinse valve for ~20 seconds
- Spin Valve in Same Direction to FILTER
- Turn ON Pump and pressure should decrease and water flow increase
That’s It! If you see good water flow at the pool, your heater and chlorinator should be working, but always check your equipment.
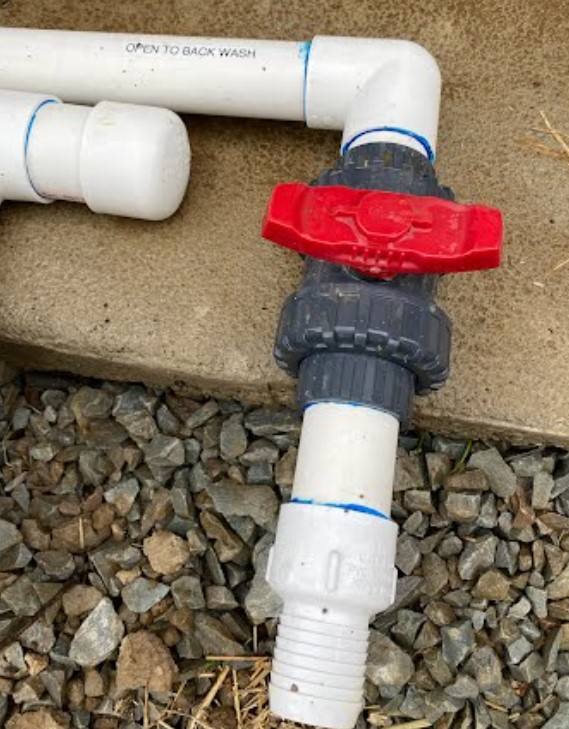
Note: You can leave this valve open for Backwash, Rinse & Waste. We put a valve here because a Multiport (Spin Valve) can eventually leak so having a valve you can close off can add years until you have to replace your Multiport.
FULL BACKWASH (FULL CLEAN)
1. BACKWASH > 2. RINSE > 3. FILTER
BACKWASH UNTIL CLEAR
STOP when CLEAR ~ 5 minutes
Add more DE Powder into the skimmer when back to FILTER MODE
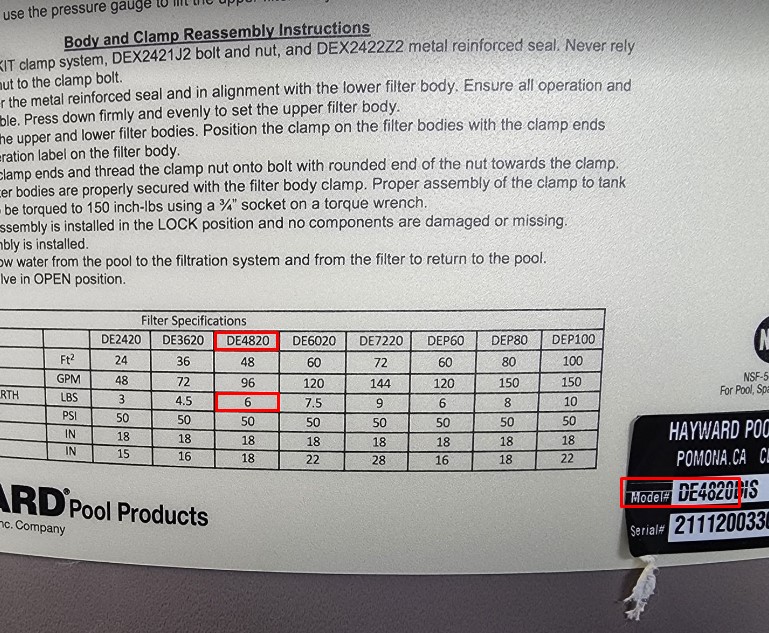
Replace about **HALF of what is recommended on the filter sticker when adding back DE powder after a full backwash. Too much DE can clog and damage the grid!
**NOTE: A FULL Backwash does NOT remove ALL DE -> A full disassemble is needed to completely clean!
DISASSEMBLE AND CLEAN (1-2 TIMES PER SEASON)
Unless you have a major issue or a very dirty pool (after new construction or winter), you should only have to take apart the filter a couple times per season. Remove the clamp and pull out the entire filter, clean, degrease, and reassemble. Recoat the grid with the recommended amount of DE on the filter sticker. We can also perform this service for you or learn how to here.
Balance the Water Weekly!
Proper Chemistry is key!
Test strips will tell you 90% of what you need to know and we can professionally test your water for free. It is important to keep good chemistry records for warranty purposes and test weekly.
A Shock Never Hurts!
A Weekly Shock doesn’t hurt…
it is not necessary but dependent on many factors and how heavy you use your pool. Shocking helps oxidize contaminants and keep your water clear. You can shock with chlorine or non-chlorine shock or the super chlorinate function on your chlorine generator.
TIP: Utilizing the RECIRCULATE function on the valve is a great way to add chemicals to the skimmer and evenly distribute into the pool without going thru the filter. Just remember to put it back to FILTER once dispersed and run for a couple hours to fully circulate.
About Salt Water
It’s still Chlorine!
As mentioned above, a Salt Water Pool is still a chlorine pool, but the chlorine is generated from Pool Salt in the water. Your water tends to be softer and it is less expensive and easier overall than buying and handling chlorine. Salt systems typically pay for themselves in the first couple seasons. We highly recommend them, but for them to work, you need:
- Proper Salt Level RANGE (2700-3600 ppm) *Salt Generator Brands may vary
- Proper Water Flow
- A properly sized and functioning Generator/Cell
Salt levels are typically indicated on your equipment. The salt level can also be tested with strips or with a meter but will NOT always match your system. ALWAYS ESTIMATE LOWER when adding salt.
If your salt is too high, you can damage equipment and the only way to bring it down is to drain water and replace it with fresh water to dilute!
Do I Need Anything Else?
NO! but we do highly recommend Borates!
Adding Borates to your water using a product like ProTeam Supreme and maintaining them at proper levels has numerous benefits. Like salt, once you have the proper amount, you only maintain it and it only decreases due to water loss. We highly recommend them and benefits include:
- pH Buffering: Stabilize pH levels preventing fluctuations that can damage equipment
- Algae Prevention: Borates help stabilize chlorine and naturally prevent algae
- Long Term Cost Savings: Reduces the need for other chemicals
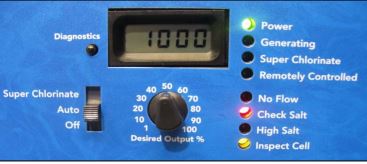
Every so often (3 months or 500 hours,) a Hayward Aquarite System will want you to clean your TurboCell and may bother you about it through notifications in your Omnilogic App and a light indicating to Inspect Cell. All you have to do to get rid of the alarm/notification is to PRESS AND HOLD the Diagnostics button ON THE UNIT until the inspect cell light goes out. If you clear it in the Omnilogic app only, it will not clear it on the unit.
The diagnostics button does NOT apply to a Hayward Omni or Omni PL with built in breakers in the box.
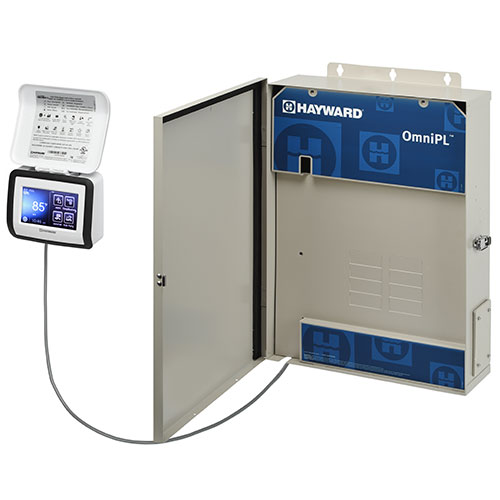
TurboCell cleaning frequency will be dependent on several factors, especially pH and Calcium Hardness. Calcium buildup (or scale,) is the most common in a salt chlorinated pool. Typically, you will JUST RESET the notification, because our equipment is oversized, and build up will be very minimal. If you do need it cleaned, we recommend a service call.
If you want to clean it yourself, you can follow these steps:

- Turn off the power to the system and deactivate the pool pump before removing the Turbo Cell.
- Remove the Turbo Cell (unions on both ends). Once removed, look through the cell and inspect for scale formation (light colored crusty or flaky deposits) on the plates and for debris that is caught on the plates. If no deposits are visible, reinstall the cell.
- If deposits are seen, use a high pressure garden hose to flush the scale off.
- If a high pressure hose does not remove the majority of deposits, then use a mild acid wash. Be sure to wear rubber gloves and appropriate eye protection. In a clean plastic container, mix a 4:1 solution of water to muriatic acid (one gallon of water to one quart of acid).
Caution: ALWAYS ADD ACID TO WATER – NEVER ADD WATER TO ACID. - Fasten the Turbo Cell to Cell Cleaning Stand with the cord side down. Before filling Turbo Cell with muriatic acid solution, place a container underneath to avoid any spills. Fill the Turbo Cell to the top with the solution and let soak for 15 minutes. Empty the Turbo Cell and inspect. If clean, rinse with hose and reinstall. If there are still deposits after soaking, repeat the soaking procedure until clean. The water/muriatic acid mixture can be stored for later use or it can be disposed of. Follow the chemical manufacturer’s recommendations when storing or disposing the water/acid solution.
- Reinstall the Turbo Cell. Press the small diagnostic button next to the display for 3 seconds to stop the flashing Inspect Cell LED and reset the countdown timer for another 500 operational hours.
Heating the Pool
You Need Water Flow
Quite often the reason a heater will not heat is poor water flow. Enough water has to be moving through the system (just look at or feel the water at the returns) or pool heaters will not turn on and heat. This does not mean your heater is broken.
TIP: Utilizing the RECIRCULATE function on the valve is a quick way to bypass the filter to determine if the problem is your filter not allowing enough water flow for the heater to work.
Controlling with Automation
Most heaters hookup with a simple 2 wire connection. The automation controller takes over turning on and off the heater by a very simple ‘Heat’ or ‘No Heat’ type of control. If there is a problem at the heater itself, the system will not know. It will ask for heat, but the heater will simply not heat the water. If your pool seems to not be heating:
- Check that the Heater is on and has power
- Check Proper Flow (Backwash as explained above!)
- Check that the Heater is set to ‘Remote’ or ‘External’ Control
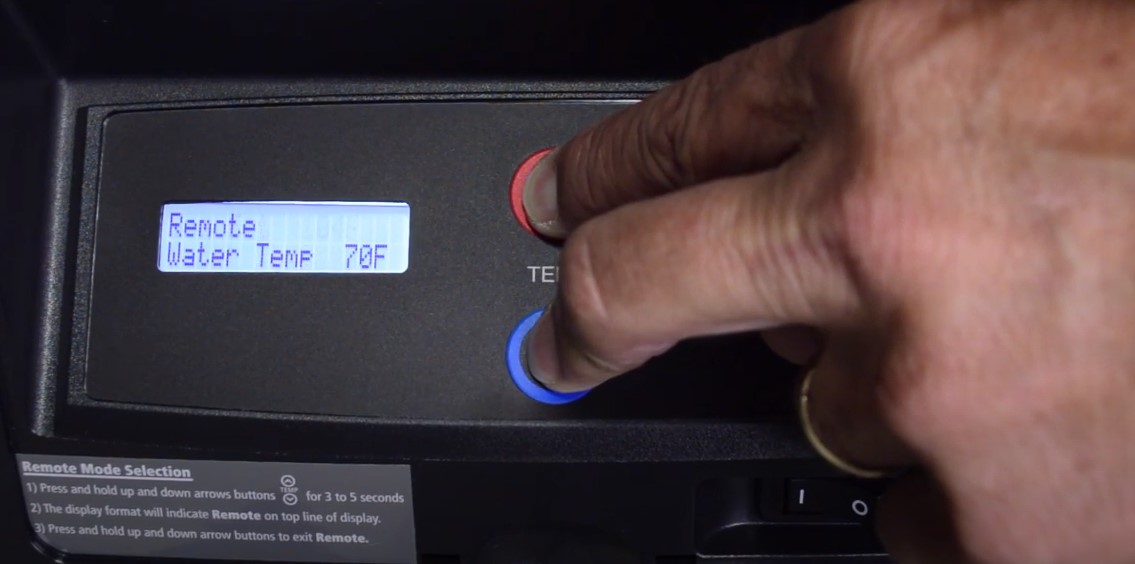
Hold the Up and Down arrows for 3-5 Seconds to toggle ‘Remote’ Mode ON or OFF. Make sure the temperature ON THE HEATER DISPLAY is set to the maximum you would ever want the pool to heat up to before turning on Remote Mode.
Stripping and DEEP Cleaning your Filter
We can provide this service or DIY
Every filter needs disassembled and stripped and cleaned eventually. Unlike a cartridge filter which you could be doing weekly, a DE filter should typically only need this once or twice each season. This procedure is for a typical Hayward Vertical Grid filter:
- Start with a thorough backwash to remove as much DE as possible (Backwash as explained above!)
- With the proper wrench or socket, loosen the bolt and remove the clamp
- Lift straight up on sides of top manifold, with a slight twisting motion, to free the grids from the standpipe. Two people may be needed, to lift the grid assembly out
- Do not take the grid assembly apart, but spray grids GENTLY with a hose fully in-between to completely clean DE powder on both sides
- Spray or soak the grids to remove oils and grease using a degreasing product for filters (we recommend Zep Fast 505)
- If you have mineral deposits (typically calcium scale) soak the grid assembly in a 20% solution of Water and Muriatic Acid (5:1 ratio) in a large (clean) trash can for several hours, and then hose off thoroughly
- INSPECT grids for tears or rips in the fabric or cracks in the manifold
- Replace grids carefully back into tank, applying silicone spray or lubricant to the O-ring
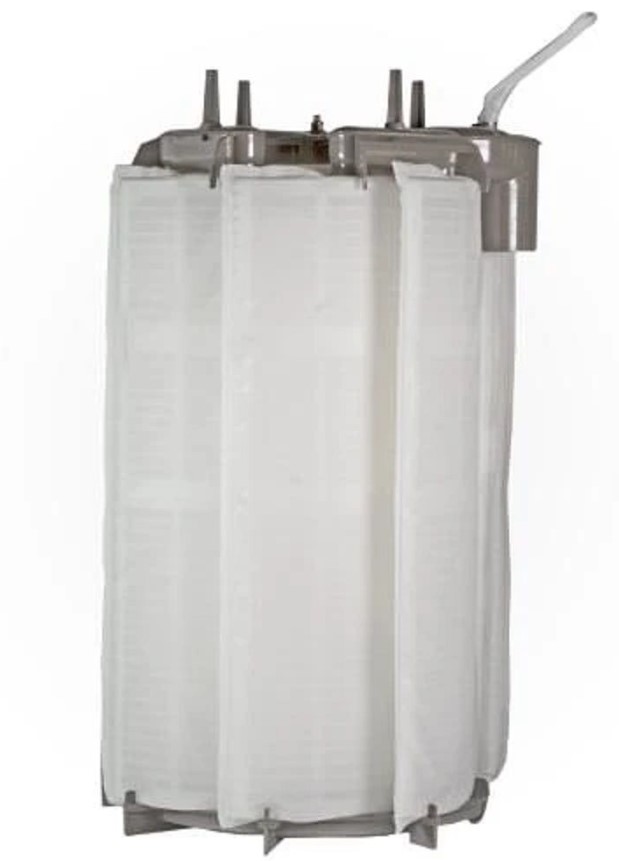
Replace DE grids when they begin to tear and fray, or if filter pressure remains high even after cleaning with DE filter cleaner. Of course, DE powder in the pool is another sign that you need to replace the filter grids.
